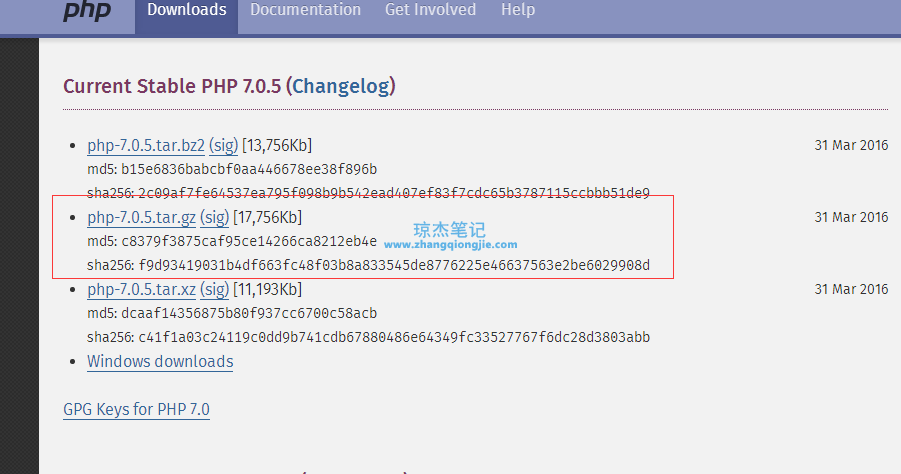
准备工作:当然首先要下载PHP和Nginx包文件,下面是我分享的两个包:
(若链接失效,记得留言)
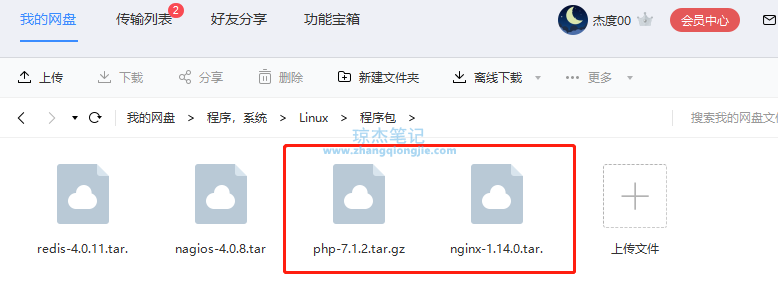
然后通过工具(我用xftp)上传到系统相应路径用tar -zxvf 压缩文件,进行解压如下图:

一、安装配置PHP
1.安装依赖包
yum -y install libxml2 libxml2-devel gcc cc libicu-devel libxml2 libxml2-devel openssl openssl-devel curl curl-devel libjpeg libjpeg-devel libpng libpng-devel freetype freetype-devel pcre pcre-devel libxslt libxslt-devel bzip2 bzip2-devel
2.切换到php包目录下,配置路径如下图:
./configure --prefix=/usr/local/php --with-curl --with-freetype-dir --with-gd --with-gettext --with-iconv-dir --with-kerberos --with-libdir=lib64 --with-libxml-dir --with-mysqli --with-openssl --with-pcre-regex --with-pdo-mysql --with-pdo-sqlite --with-pear --with-png-dir --with-jpeg-dir --with-xmlrpc --with-xsl --with-zlib --with-bz2 --with-mhash --enable-fpm --enable-bcmath --enable-libxml --enable-inline-optimization --enable-gd-native-ttf --enable-mbregex --enable-mbstring --enable-opcache --enable-pcntl --enable-shmop --enable-soap --enable-sockets --enable-sysvsem --enable-sysvshm --enable-xml --enable-zip
或
./configure --prefix=/usr/local/php --with-config-file-path=/usr/local/php/etc --with-config-file-scan-dir=/usr/local/php/conf.d --enable-fpm --with-fpm-user=www --with-fpm-group=www --enable-mysqlnd --with-mysqli=mysqlnd --with-pdo-mysql=mysqlnd --with-iconv-dir --with-freetype-dir=/usr/local/freetype --with-jpeg-dir --with-png-dir --with-zlib --with-libxml-dir=/usr --enable-xml --disable-rpath --enable-bcmath --enable-shmop --enable-sysvsem --enable-inline-optimization --with-curl --enable-mbregex --enable-mbstring --enable-intl --enable-ftp --with-gd --with-openssl --with-mhash --enable-pcntl --enable-sockets --with-xmlrpc --enable-zip --enable-soap --with-gettext --disable-fileinfo --enable-opcache --with-xsl
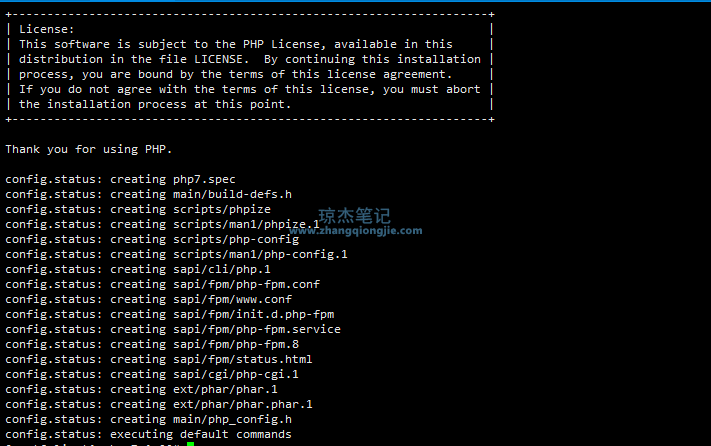
正常情况会有如下图提示,表示成功:
3.开始编译安装:(提示:安装过程较慢)
[root@client1 php-7.1.2]# make && make install
安装完成有如下图“Bulid complete.”提示:
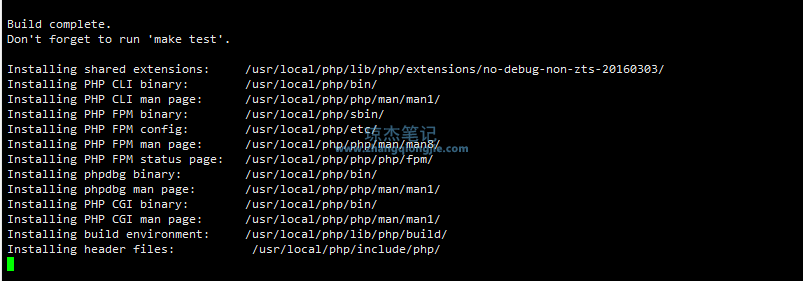
(提示:安装完成后官方会建议执行make test命令进行测试,因为验证一万多个文件特别慢,所以不建议测试!)
4.编译安装完成后PHP需要配置php.ini文件,此时只需复制php.ini-production到 /usr/local/lib/php.ini即可,php.ini文件一般在/usr/local/lib/和/etc目录下
[root@client1 lib]# cp /data/software/nginx+php/php-7.1.2/php.ini-production /usr/local/lib/php.ini
5.启动php-fpm会报错如下图:

[11-Dec-2018 11:40:55] ERROR: failed to open configuration file '/data/php/etc/php-fpm.conf': No such file or directory (2)
[11-Dec-2018 11:40:55] ERROR: failed to load configuration file '/data/php/etc/php-fpm.conf'
[11-Dec-2018 11:40:55] ERROR: FPM initialization failed
意思是/usr/local/php/etc/php-fpm.conf目录下找不到php-fpm.conf配置文件(这个目录下的php-fpm.conf.default配置文件就是php-fpm.conf,为了安全起见,将其复制为php-fpm.conf)
[root@client1 etc]# cp /usr/local/php/etc/php-fpm.conf.default /usr/local/php/etc/php-fpm.conf
重新启动php-fpm,会有如下报错:

[11-Dec-2018 11:44:34] WARNING: Nothing matches the include pattern '/data/php/etc/php-fpm.d/*.conf' from /data/php/etc/php-fpm.conf at line 125.
[11-Dec-2018 11:44:34] ERROR: No pool defined. at least one pool section must be specified in config file
[11-Dec-2018 11:44:34] ERROR: failed to post process the configuration
[11-Dec-2018 11:44:34] ERROR: FPM initialization failed
[root@zabbix-server01 sbin]# cp /data/php/etc/php-fpm.d/www.conf.default /data/php/etc/php-fpm.d/www.conf
意思是/usr/local/php/etc/php-fpm.conf的125行没有包含/usr/local/php/etc/php-fpm.d/*.conf的文件,和上面报错的解决方法一样,将默认的www.conf.default配置文件拷贝为www.conf即可
[root@client1 etc]# cp /usr/local/php/etc/php-fpm.d/www.conf.default /usr/local/php/etc/php-fpm.d/www.conf
再启动php-fpm就没有问题了,测试9000端口打开即表示启动成功!

php -v可以看到安装的php版本
二、安装配置nginx
1.安装编译工具及库文件
yum -y install make zlib zlib-devel gcc-c++ libtool openssl openssl-devel
2.首先安装PCRE,作用是让Nginx支持重写功能,
a.下载并解压pcre:
[root@client1 nginx+php]# wget http://downloads.sourceforge.net/project/pcre/pcre/8.35/pcre-8.35.tar.gz
b.切换到pcre目录,开始编译安装
[root@client1 pcre-8.35]# ./configure
[root@client1 pcre-8.35]# make && make install
c.查看pcre版本
[root@client1 pcre-8.35]# pcre-config --version
如下图:

3.切换到nginx目录下开始编译安装
提示:若nginx1.14.0版本安装有报错,可以测试新版本1.20.1:https://nginx.org/download/nginx-1.20.1.tar.gz
[root@client1 nginx+php]# cd nginx-1.14.0/
[root@client1 nginx-1.14.0]# ./configure --prefix=/usr/local/nginx
[root@client1 nginx-1.14.0]# make && make install
4.查看nginx版本:[root@client1 nginx-1.14.0]# /usr/local/nginx/sbin/nginx -v
如下图:

5.创建Nginx运行使用的用户:www
[root@client1 nginx-1.14.0]# groupadd www
[root@client1 nginx-1.14.0]# useradd -g www www
6.配置nginx.conf,如下图:

验证nginx配置是否正确:进入nginx安装目录sbin下,运行:./nginx -t;或者在启动命令前加-t,如:/usr/local/nginx/sbin/nginx -t -c /usr/local/nginx/conf/nginx.conf
提示如下表示配置正确:

worker_processes 2; #设置值和CPU核心数一致2 ; #设置值和CPU核心数一致
error_log /usr/local/webserver/nginx/logs/nginx_error.log crit; #日志位置和日志级别/ usr / local / webserver / nginx / logs / nginx_error 。日志暴击; #日志位置和日志级别
pid /usr/local/webserver/nginx/nginx.pid;/ usr / local / webserver / nginx / nginx 。pid ;
#指定此进程可以打开的最大文件描述符的值。#指定此进程可以打开的最大文件描述符的值。
worker_rlimit_nofile 65535;65535 ;
事件
{{
  使用epoll;使用epoll ;
  worker_connections 65535;65535 ;
}}
HTTP
{{
  包括mime.types;。类型;
  default_type application / octet-stream;/ octet - stream ;
  log_format main'$ remote_addr  -  $ remote_user [$ time_local]“$ request”''$ remote_addr  -  $ remote_user [$ time_local]“$ request”'
               '$ status $ body_bytes_sent“$ http_referer”''$ status $ body_bytes_sent“$ http_referer”'
               '“$ http_user_agent”$ http_x_forwarded_for';'“$ http_user_agent”$ http_x_forwarded_for' ;

#charset gb2312;#charset gb2312;

  server_names_hash_bucket_size 128;128 ;
  client_header_buffer_size 32k;32k ;
  large_client_header_buffers 4 32k;4 32k ;
  client_max_body_size 8m;8米;

  sendfile on;;
  tcp_nopush on;;
  keepalive_timeout 60;60 ;
  tcp_nodelay on;;
  fastcgi_connect_timeout 300;300 ;
  fastcgi_send_timeout 300;300 ;
  fastcgi_read_timeout 300;300 ;
  fastcgi_buffer_size 64k;64k ;
  fastcgi_buffers 4 64k;4 64k ;
  fastcgi_busy_buffers_size 128k;128k ;
  fastcgi_temp_file_write_size 128k;128k ;
  gzip on; ;
  gzip_min_length 1k;1k ;
  gzip_buffers 4 16k;4 16k ;
  gzip_http_version 1.0;1.0 ;
  gzip_comp_level 2;2 ;
  gzip_types text / plain application / x-javascript text / css application / xml;/ plain application / x - javascript text / css application / xml ;
  gzip_vary on;;

  #limit_zone crawler $ binary_remote_addr 10m;#limit_zone crawler $ binary_remote_addr 10m;
 #下面是服务器虚拟主机的配置#下面是服务器虚拟主机的配置
 服务器
  {{
    听80;#监听端口80 ;#监听端口
    server_name localhost;#域名;#域名
    index index.html index.htm index.php;。html索引。htm指数。php ;
    root / usr / local / webserver / nginx / html;#站点目录/ usr / local / webserver / nginx / html ;#站点目录
      location~. * \。(php | php5)?$〜。* \。(php | php5 )?$
    {{
      #fastcgi_pass unix:/tmp/php-cgi.sock;#fastcgi_pass unix:/tmp/php-cgi.sock;
      fastcgi_pass 127.0.0.1:9000;127.0 。0.1 :9000 ;
      fastcgi_index index.php;
      包括fastcgi.conf;
    }
    location~. * \。(gif | jpg | jpeg | png | bmp | swf | ico)$
    {
      到期30d;
  #access_log off;
    }
    location~. * \。(js | css)?$
    {
      到期15d;
   #access_log off;
    }
    access_log off;
  }

}
nginx.conf参考配置
提示:kill -HUP pid
pid 是进程标识。如果想要更改配置而不需停止并重新启动服务,请使用该命令。在对配置文件作必要的更改后,发出该命令以动态更新服务配置。
7.在html目录下创建php文件,touch index.php,并进行编辑写入如下内容,保存退出
<?php
phpinfo();
重启nginx,./sbin/nginx -s reload,重新打开网页显示如下图所示,表示nginx+PHP环境安装成功! 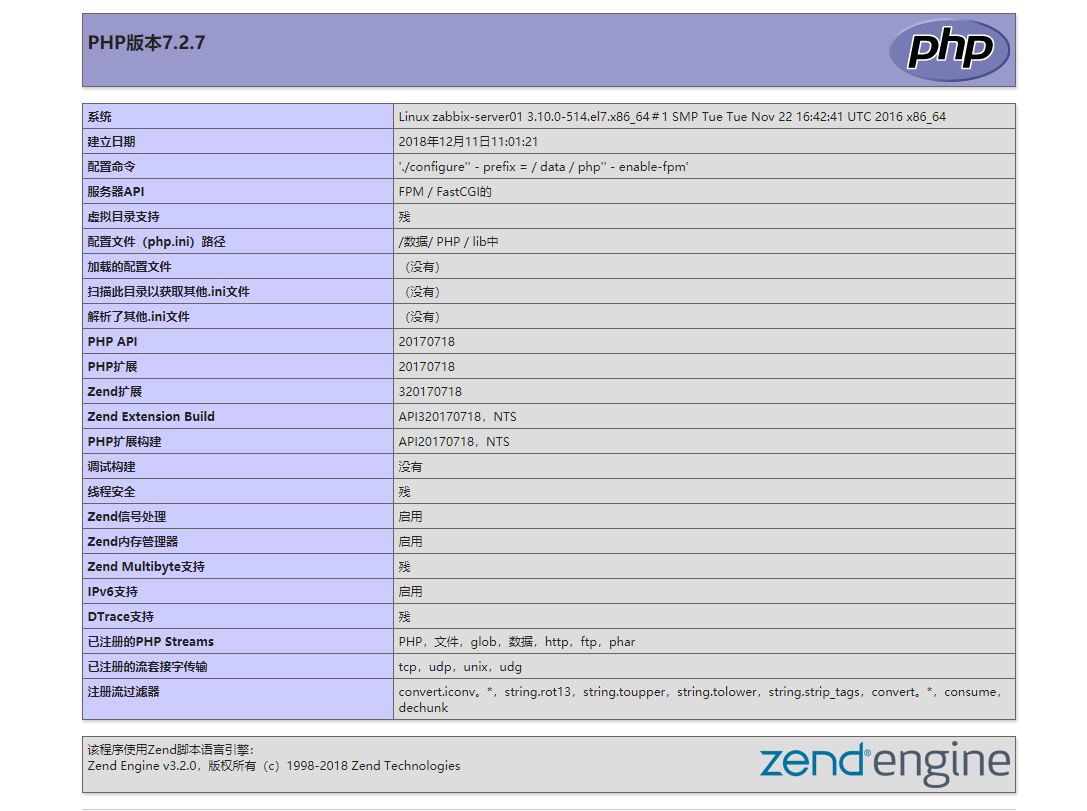
如有错误或纰漏之处,还望留言,大家共同探讨学习交流!
参考博客:https://www.cnblogs.com/hsia2017/p/6711171.html
 琼杰笔记
琼杰笔记


评论前必须登录!
注册