一、libvirt安装配置
libvirt支持的虚拟化技术有:KVM, XEN, VMWARE, Qemu, LXC, OpenVZ;其node表示物理节点,domain表示虚拟机实例。
1.安装
libvirt相关组件
[root@master01 ~]# yum install libvirt libvirt-client virt-install virt-manager virt-viewer
安装qemu-kvm
[root@master01 ~]# yum install qemu-kvm
2.启动libvirtd
[root@master01 ~]# systemctl start libvirtd
3.配置
1. libvirt和libvirtd的配置文件:
- libvirt配置文件:/etc/libvirt/libvirt.conf
- 守护进程配置文件:/etc/libvirt/libvirtd.conf
2.qemu配置文件:/etc/libvirt/qemu/networks/default.xml
[root@master01 networks]# more /etc/libvirt/qemu/networks/default.xml
<!--
WARNING: THIS IS AN AUTO-GENERATED FILE. CHANGES TO IT ARE LIKELY TO BE
OVERWRITTEN AND LOST. Changes to this xml configuration should be made using:
virsh net-edit default
or other application using the libvirt API.
-->

<network>
<name>default</name>
<uuid>b6591a69-04c1-4f30-8866-9b966a1a6f28</uuid>
<forward mode='nat'/>
<bridge name='virbr0' stp='on' delay='0'/>
<mac address='52:54:00:62:47:29'/>
<ip address='192.168.122.1' netmask='255.255.255.0'>
<dhcp>
<range start='192.168.122.2' end='192.168.122.254'/>
</dhcp>
</ip>
</network>

二、创建虚拟机
1.virt-manager
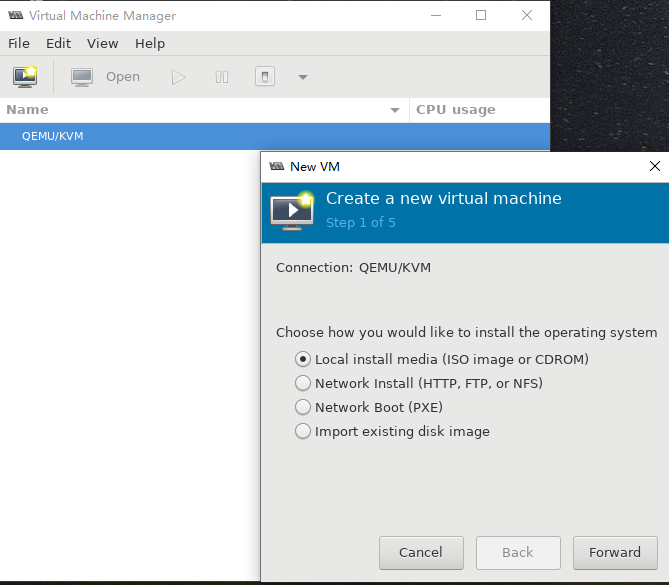
使用virt-manager调用图形化界面创建虚拟机
[root@master01 images]# virt-manager &
[1] 3218

virsh命令使用说明:
[root@master01 images]# virsh --help

virsh [options]... [<command_string>]
virsh [options]... <command> [args...]

options:
-c | --connect=URI hypervisor connection URI
-d | --debug=NUM debug level [0-4]
-e | --escape <char> set escape sequence for console
-h | --help this help
-k | --keepalive-interval=NUM
keepalive interval in seconds, 0 for disable
-K | --keepalive-count=NUM
number of possible missed keepalive messages
-l | --log=FILE output logging to file
-q | --quiet quiet mode
-r | --readonly connect readonly
-t | --timing print timing information
-v short version
-V long version
--version[=TYPE] version, TYPE is short or long (default short)
commands (non interactive mode):

Domain Management (help keyword 'domain')
attach-device attach device from an XML file
attach-disk attach disk device
attach-interface attach network interface
autostart autostart a domain
blkdeviotune Set or query a block device I/O tuning parameters.
blkiotune Get or set blkio parameters
blockcommit Start a block commit operation.
blockcopy Start a block copy operation.
blockjob Manage active block operations
blockpull Populate a disk from its backing image.
blockresize Resize block device of domain.
change-media Change media of CD or floppy drive
console connect to the guest console
cpu-stats show domain cpu statistics
create create a domain from an XML file
define define (but don't start) a domain from an XML file
desc show or set domain's description or title
destroy destroy (stop) a domain
detach-device detach device from an XML file
detach-device-alias detach device from an alias
detach-disk detach disk device
detach-interface detach network interface
domdisplay domain display connection URI
domfsfreeze Freeze domain's mounted filesystems.
domfsthaw Thaw domain's mounted filesystems.
domfsinfo Get information of domain's mounted filesystems.
domfstrim Invoke fstrim on domain's mounted filesystems.
domhostname print the domain's hostname
domid convert a domain name or UUID to domain id
domif-setlink set link state of a virtual interface
domiftune get/set parameters of a virtual interface
domjobabort abort active domain job
domjobinfo domain job information
domname convert a domain id or UUID to domain name
domrename rename a domain
dompmsuspend suspend a domain gracefully using power management functions
dompmwakeup wakeup a domain from pmsuspended state
domuuid convert a domain name or id to domain UUID
domxml-from-native Convert native config to domain XML
domxml-to-native Convert domain XML to native config
dump dump the core of a domain to a file for analysis
dumpxml domain information in XML
edit edit XML configuration for a domain
event Domain Events
inject-nmi Inject NMI to the guest
iothreadinfo view domain IOThreads
iothreadpin control domain IOThread affinity
iothreadadd add an IOThread to the guest domain
iothreaddel delete an IOThread from the guest domain
send-key Send keycodes to the guest
send-process-signal Send signals to processes
lxc-enter-namespace LXC Guest Enter Namespace
managedsave managed save of a domain state
managedsave-remove Remove managed save of a domain
managedsave-edit edit XML for a domain's managed save state file
managedsave-dumpxml Domain information of managed save state file in XML
managedsave-define redefine the XML for a domain's managed save state file
memtune Get or set memory parameters
perf Get or set perf event
metadata show or set domain's custom XML metadata
migrate migrate domain to another host
migrate-setmaxdowntime set maximum tolerable downtime
migrate-getmaxdowntime get maximum tolerable downtime
migrate-compcache get/set compression cache size
migrate-setspeed Set the maximum migration bandwidth
migrate-getspeed Get the maximum migration bandwidth
migrate-postcopy Switch running migration from pre-copy to post-copy
numatune Get or set numa parameters
qemu-attach QEMU Attach
qemu-monitor-command QEMU Monitor Command
qemu-monitor-event QEMU Monitor Events
qemu-agent-command QEMU Guest Agent Command
reboot reboot a domain
reset reset a domain
restore restore a domain from a saved state in a file
resume resume a domain
save save a domain state to a file
save-image-define redefine the XML for a domain's saved state file
save-image-dumpxml saved state domain information in XML
save-image-edit edit XML for a domain's saved state file
schedinfo show/set scheduler parameters
screenshot take a screenshot of a current domain console and store it into a file
set-lifecycle-action change lifecycle actions
set-user-password set the user password inside the domain
setmaxmem change maximum memory limit
setmem change memory allocation
setvcpus change number of virtual CPUs
shutdown gracefully shutdown a domain
start start a (previously defined) inactive domain
suspend suspend a domain
ttyconsole tty console
undefine undefine a domain
update-device update device from an XML file
vcpucount domain vcpu counts
vcpuinfo detailed domain vcpu information
vcpupin control or query domain vcpu affinity
emulatorpin control or query domain emulator affinity
vncdisplay vnc display
guestvcpus query or modify state of vcpu in the guest (via agent)
setvcpu attach/detach vcpu or groups of threads
domblkthreshold set the threshold for block-threshold event for a given block device or it's backing chain element

Domain Monitoring (help keyword 'monitor')
domblkerror Show errors on block devices
domblkinfo domain block device size information
domblklist list all domain blocks
domblkstat get device block stats for a domain
domcontrol domain control interface state
domif-getlink get link state of a virtual interface
domifaddr Get network interfaces' addresses for a running domain
domiflist list all domain virtual interfaces
domifstat get network interface stats for a domain
dominfo domain information
dommemstat get memory statistics for a domain
domstate domain state
domstats get statistics about one or multiple domains
domtime domain time
list list domains

Host and Hypervisor (help keyword 'host')
allocpages Manipulate pages pool size
capabilities capabilities
cpu-baseline compute baseline CPU
cpu-compare compare host CPU with a CPU described by an XML file
cpu-models CPU models
domcapabilities domain capabilities
freecell NUMA free memory
freepages NUMA free pages
hostname print the hypervisor hostname
hypervisor-cpu-baseline compute baseline CPU usable by a specific hypervisor
hypervisor-cpu-compare compare a CPU with the CPU created by a hypervisor on the host
maxvcpus connection vcpu maximum
node-memory-tune Get or set node memory parameters
nodecpumap node cpu map
nodecpustats Prints cpu stats of the node.
nodeinfo node information
nodememstats Prints memory stats of the node.
nodesuspend suspend the host node for a given time duration
sysinfo print the hypervisor sysinfo
uri print the hypervisor canonical URI
version show version

Interface (help keyword 'interface')
iface-begin create a snapshot of current interfaces settings, which can be later committed (iface-commit) or restored (iface-rollback)
iface-bridge create a bridge device and attach an existing network device to it
iface-commit commit changes made since iface-begin and free restore point
iface-define define an inactive persistent physical host interface or modify an existing persistent one from an XML file
iface-destroy destroy a physical host interface (disable it / "if-down")
iface-dumpxml interface information in XML
iface-edit edit XML configuration for a physical host interface
iface-list list physical host interfaces
iface-mac convert an interface name to interface MAC address
iface-name convert an interface MAC address to interface name
iface-rollback rollback to previous saved configuration created via iface-begin
iface-start start a physical host interface (enable it / "if-up")
iface-unbridge undefine a bridge device after detaching its slave device
iface-undefine undefine a physical host interface (remove it from configuration)

Network Filter (help keyword 'filter')
nwfilter-define define or update a network filter from an XML file
nwfilter-dumpxml network filter information in XML
nwfilter-edit edit XML configuration for a network filter
nwfilter-list list network filters
nwfilter-undefine undefine a network filter
nwfilter-binding-create create a network filter binding from an XML file
nwfilter-binding-delete delete a network filter binding
nwfilter-binding-dumpxml network filter information in XML
nwfilter-binding-list list network filter bindings

Networking (help keyword 'network')
net-autostart autostart a network
net-create create a network from an XML file
net-define define an inactive persistent virtual network or modify an existing persistent one from an XML file
net-destroy destroy (stop) a network
net-dhcp-leases print lease info for a given network
net-dumpxml network information in XML
net-edit edit XML configuration for a network
net-event Network Events
net-info network information
net-list list networks
net-name convert a network UUID to network name
net-start start a (previously defined) inactive network
net-undefine undefine a persistent network
net-update update parts of an existing network's configuration
net-uuid convert a network name to network UUID

Node Device (help keyword 'nodedev')
nodedev-create create a device defined by an XML file on the node
nodedev-destroy destroy (stop) a device on the node
nodedev-detach detach node device from its device driver
nodedev-dumpxml node device details in XML
nodedev-list enumerate devices on this host
nodedev-reattach reattach node device to its device driver
nodedev-reset reset node device
nodedev-event Node Device Events

Secret (help keyword 'secret')
secret-define define or modify a secret from an XML file
secret-dumpxml secret attributes in XML
secret-event Secret Events
secret-get-value Output a secret value
secret-list list secrets
secret-set-value set a secret value
secret-undefine undefine a secret

Snapshot (help keyword 'snapshot')
snapshot-create Create a snapshot from XML
snapshot-create-as Create a snapshot from a set of args
snapshot-current Get or set the current snapshot
snapshot-delete Delete a domain snapshot
snapshot-dumpxml Dump XML for a domain snapshot
snapshot-edit edit XML for a snapshot
snapshot-info snapshot information
snapshot-list List snapshots for a domain
snapshot-parent Get the name of the parent of a snapshot
snapshot-revert Revert a domain to a snapshot

Storage Pool (help keyword 'pool')
find-storage-pool-sources-as find potential storage pool sources
find-storage-pool-sources discover potential storage pool sources
pool-autostart autostart a pool
pool-build build a pool
pool-create-as create a pool from a set of args
pool-create create a pool from an XML file
pool-define-as define a pool from a set of args
pool-define define an inactive persistent storage pool or modify an existing persistent one from an XML file
pool-delete delete a pool
pool-destroy destroy (stop) a pool
pool-dumpxml pool information in XML
pool-edit edit XML configuration for a storage pool
pool-info storage pool information
pool-list list pools
pool-name convert a pool UUID to pool name
pool-refresh refresh a pool
pool-start start a (previously defined) inactive pool
pool-undefine undefine an inactive pool
pool-uuid convert a pool name to pool UUID
pool-event Storage Pool Events

Storage Volume (help keyword 'volume')
vol-clone clone a volume.
vol-create-as create a volume from a set of args
vol-create create a vol from an XML file
vol-create-from create a vol, using another volume as input
vol-delete delete a vol
vol-download download volume contents to a file
vol-dumpxml vol information in XML
vol-info storage vol information
vol-key returns the volume key for a given volume name or path
vol-list list vols
vol-name returns the volume name for a given volume key or path
vol-path returns the volume path for a given volume name or key
vol-pool returns the storage pool for a given volume key or path
vol-resize resize a vol
vol-upload upload file contents to a volume
vol-wipe wipe a vol

Virsh itself (help keyword 'virsh')
cd change the current directory
echo echo arguments
exit quit this interactive terminal
help print help
pwd print the current directory
quit quit this interactive terminal
connect (re)connect to hypervisor


(specify help <group> for details about the commands in the group)

(specify help <command> for details about the command)

[2]+ Done virt-manager
2.virt-install
virt-install是一个命令行工具,它能够为KVM、Xen或其他支持libvirt API的hypervisor创建虚拟机并完成GuestOS安装。此外,它能够基于串行控制台、VNC或SDL支持或图形安装界面。安装过程可以使用本地的安装介质如CDROM,也可以通过网络方式如NFS、HTTP或FTP服务实现。对于通过网络安装的方式,virt-install可以自动加载必要的文件以启动安装过程而无需额外提供引导工具。当然,virt-install也支持PXE方式的安装过程,也能够直接使用现有的磁盘映像直接启动安装过程。
virt-install命令有许多选项,这些选项大致可以分为:
1.一般选项:指定虚拟机的名称、内存大小、VCPU个数及特性等;
- -n NAME, –name=NAME: 虚拟机名称,需全局统一;
- -r MEMORY, –ram=MEMORY: 虚拟机内存大小,单位MB;
- –vcpu=VCPUS[,maxvcpus=MAX][,sockets=#][,cores=#][,threads=#]: VCPU个数及相关配置;
- –cpu=CPU: CPU模式及特性,如coreduo等,可以使用qemu-kvm -cpu ?来获取支持的CPU模式;
2.安装方法:指定安装方法、GuestOS类型等
- -c CDROM, –cdrom=CDROM: 光盘安装介质;
- -l LOCATION, –location=LOCATION: 安装源URL,支持FTP、HTTP及NFS等,如ftp://172.16.0.1/pub或http://172.16.0.1/Centos-x86_64;
- –pxe: 基于PXE完成安装;
- –livecd: 把光盘当做LiveCD;
- –os-tpye=DISTRO_TYPE: 操作系统类型,如Linux、Windows或Unix等;
- -x EXTRA, –extra-args=EXTRA: 根据–location指定的方式安装GuestOS时,用于传递给内核的额外选项,例如指定kickstart文件的位置,–extra-args “ks=http://172.16.0.1/class.cfg”;
- –boot=BOOTOPTS: 指定安装过程完成后的配置选项,如指定引导设备次序、使用指定的而非安装的kernel、initrd来引导系统启动等。例如:–boot cdrom,hd,network: 指定引导次序;–boot kernel=KERNEL,initrd=INITRD,kernel_args=”console=/dev/tty50″: 指定启动系统的内核及initrd文件;
3.存储配置:指定存储类型、位置及属性等;
–disk=DISOPTS: 指定存储设备及其属性,格式为–disk /some/storage/path,optl-val1,opt2=val2等,常用的选项:
- device: 设备类型,如cdrom、disk或floppy等,默认为disk;
- bus: 磁盘总线类型,其值可以是ide, scsi, usb, virtio或xen;
- perms: 访问权限,如rw, ro或sh(共享的可读写),默认为rw;
- size: 新建磁盘映像文件大小,单位GB;
- cache: 缓存模型,其值有none, writethrouth(缓存读)及writeback(缓存读写);
- format:磁盘映像格式,如raw, qcow2, vmdk等;
- sparse: 磁盘映像使用稀疏格式,即不立即分配指定大小的空间;
–nodisk: 不适用本地磁盘,在LiveCD模式中常用;
4.网络配置:指定网络接口的网络类型及接口属性如MAC地址、驱动模式等;
-w NETWORK, –network=NETWORK,opt1=val1,opt2=val2: 将虚拟机接入宿主机的网络中,其中NETWORK可以为:
- bridge=BRIDGE: 连接至名为”BRIDGE”的桥设备;
- network=NAME: 连接至名为”NAME”的网段;
其他常用的选项还有:
- model: GuestOS中看到的网络设备型号,如e1000, rtl8139或virtio等;
- mac: 固定的MAC地址,省略此选项时将使用随机地址,但无论何种方式,对于KVM来说,其前三段必须是52:54:00;
–nonenetwork: 虚拟机不适用网络设备;
5.图形配置:定义虚拟机显示功能相关的配置,如VNC相关配置
–graphics TYPE,opt1=val1,opt2=val2: 指定图形显示相关的配置,此选项不会配置任何硬件(如显卡),而是仅指定虚拟机启动后对其访问的接口;
- TYPE: 指定显示类型,如vnc, sdl, spice或none等,默认为vnc;
- port: TPYE为VNC或spice时其监听的端口;
- listen: TPYE为VNC或spice时所舰艇的IP地址,默认为127.0.0.1,可以通过修改/etc/libvirt/qemu.conf定义新的默认值;
- password: TPYE为VNC或spice时,为远程访问监听的服务指定认证密码;
–noautoconsole: 禁止自动连接值虚拟机的控制台;
6.设备选项:指定文本控制台、声音设备、串行接口、并行接口、显示接口等;
–serial=CHAROPTS: 附加一个串行设备至当前虚拟机,根据设备类型的不同,可以使用不同的选项,格式为”–serial type,opt1=val1,opt2=val2,……”, 例如:
- –serial pty: 创建伪终端;
- –serial dev,path=HOSTPATH: 附加主机设备至此虚拟机;
- –video=VIDEO: 指定显卡设备类型,可用取值为:cirrus, vga, qxl或vmvga;
7.虚拟化平台:虚拟机化模型(hvm或paravirt)、模拟的CPU平台类型、模拟的主机类型、hypervisor类型(如kvm、xen或qemu等)以及当前虚拟机的UUID等;
- -v, –hvm: 当前物理机同时支持完全虚拟化和半虚拟化时,指定使用完全虚拟化;
- -p, paravirt: 指定使用半虚拟化;
- –virt-type: 使用的hypervisor,如kvm, qemu, xen等,所有可用值可通过 ‘virsh capabilities’ 命令获取;
8.其他:
- –autostart: 指定虚拟机是否在物理机启动后自动启动;
- –print-xml: 如果虚拟机不需要安装过程(–import, –boot),则显示生成的XML而不是创建此虚拟机,默认情况下,此选项仍会创建磁盘映像;
- –force: 禁止命令进入交互模式,如果需要回到yes或者no选项,则自动回答为yes;
- –dry-run: 执行创建虚拟机的整个过程,但不会真正创建虚拟机、改变主机上的设备配置信息及将其创建的需求通过通知给libvirt: -d, –debug: 显示debug信息;
尽管virt-install命令有类似如上所述的众多选项,但实际使用过程中,其必须提供的选项仅包括–name, –ram, –disk(也可以是–nodisks)及安装过程相关的选项。此外,有事还需要使用–connet=CONNET选项来指定连接至一个非默认的hypervisor。
3.virt-install使用实例
1.导入映像文件创建虚拟机:
[root@master01 images]# virt-install -n vm01 -r 512 --vcpus=2,maxvcpus=3 --disk /opt/cirros-0.5.1-x86_64-disk.img --network bridge=virbr0,model=virtio --import --serial=pty --console=pty --nographics

[root@master01 images]# virt-install -n vm02 -r 512 --vcpus=2,maxvcpus=3 --disk /opt/cirros-0.5.1-x86_64-disk.img --import --serial=pty --console=pty --nographics
- 切换到宿主机:”^]”即:Ctrl+]
- 切换到虚拟机控制台:virsh console VM_ID
2.创建一个名为vm02的虚拟机,其hypervisor为KVM,内存大小为512MB,磁盘为8GB的映像文件/var/lib/libvirt/images/vm02.img,通过ubuntu-18.04.4-live-server-amd64.iso光盘镜像来引导启动安装过程:
virt-install \
 --connect qemu:///system \
 --virt-type kvm \
 --name vm02 \
 --ram 512 \
 --vcpu 1 \
 --disk path=/var/lib/libvirt/images/vm02.img,size=8 \
 --graphics vnc \
 --cdrom /opt/ubuntu-18.04.4-live-server-amd64.iso
4.常用操作命令
- virt-install: 创建虚拟机,并安装操作系统OS,也可以创建虚拟机并导入Image文件;
- 根据xml文件创建虚拟机:create->创建并启动;define->创建但不启动;
- 关闭虚拟机domain: destroy, shutdown, reboot
- 删除虚拟机:undefine
- 连接至控制台:console
- 列出所有domain: list
- 附加或删除disk: attach-disk, detach-disk
- 附加或拆除网卡:attach-interface, detach-interface
- 保存状态值磁盘文件或从磁盘文件恢复:save, restore
- 暂停于内存或继续运行: suspend, resume
1.基于xml配置文件启动kvm虚拟机:
[root@master01 qemu]# virsh create /etc/libvirt/qemu/vm01.xml
Domain vm01 created from /etc/libvirt/qemu/vm01.xml

[root@master01 qemu]# virsh list
 Id    Name                           State
----------------------------------------------------
 1     vm01                           running
2.通过virt-viewer工具连接至虚拟机,后加虚拟机的ID号
[root@master01 qemu]# virt-viewer 1
3.关闭、删除虚拟机
[root@master01 opt]# virsh destroy vm04 # 关闭虚拟机vm04
Domain vm04 destroyed
[root@master01 opt]# virsh undefine vm04 # 仅删除虚拟机配置文件vm04
Domain vm04 has been undefined
[root@master01 opt]# virsh undefine vm04 --remove-all-storage # 删除虚拟机配置文件同时删除相关存储卷文件
4.动态添加、删除磁盘
[root@master01 opt]# qemu-img create -f qcow2 -o size=10G,preallocation=metadata /opt/second.qcow2  # 创建磁盘文件
Formatting '/opt/second.qcow2', fmt=qcow2 size=10737418240 encryption=off cluster_size=65536 preallocation='metadata' lazy_refcounts=off
[root@master01 opt]# virsh attach-disk 3 /opt/second.qcow2 vda --targetbus virtio  # 动态添加磁盘文件
Disk attached successfully
[root@master01 opt]# virsh detach-disk 3 vda
Disk detached successfully  # 动态删除磁盘文件
5.动态添加、删除网络接口
[root@master01 opt]# virsh attach-interface 3 bridge virbr0
Interface attached successfully

[root@master01 opt]# virsh detach-interface 3 bridge --mac MAC_ADDRESS  # 根据mac地址删除
 琼杰笔记
琼杰笔记


评论前必须登录!
注册